Iguana – Published content
1 Introduction
1.1 What is Published content?
‘Published content' is the module that provides a basic framework for periodic publishing of items'. This definition has been left intentionally broad. It encompasses the basic functionality of modules such as News and Calendar.
In the context of Published content three related concepts play a vital role:
· Content items: these form the actual content, e.g. a news items, a calendar item, or similar
· Content containers: the containers are the placeholders that display the actual content, either as a single item (a news item) or as an overview of items (e.g. a list of news items on the home page, or a list of calendar items for a selected period)
· Content types: each content item belongs to a “content type”, e.g. News or Calendar; there is no limit on the number of content types, so these can be created according to local needs (e.g. Library news, Youth news, Staff news, etc.).
As a whole, the module is a generic module to create, order and display all sorts of published content.
1.2 A Published content example
The following screen shots illustrate the three concepts of Published content and the relationship between them.
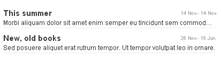
The following screen shot shows a news item “New, old books” on a news item page. The page contains two “containers”: the one at the left (with the title “News items”) is a container that shows an overview of news items (in this example two of them), while the one at the right displays a specific news item (“New, old books”). A click on an item in the overview container at the left will refresh the content in the container at the right.

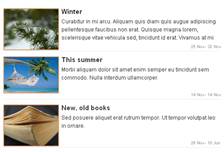
The home page of the site displays another “overview” container, one that displays three news items.
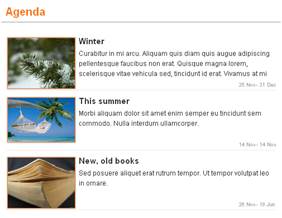
This overview container contains three news items and looks visually different from the one on the earlier page. This illustrates that a site can have as many overview containers as is needed.
It is in this context that the content type plays a role. Each published content item belongs to a content type. The overview containers that are included in the site will “group” content of (a) specific type(s) (or, content that has a specific tag attached to it). This explains the difference between the two containers in these screen shots: the second one (the one that is placed on the home page) shows items of more types than the one in the first screen shot.
To illustrate this further on the basis of these two screen shots:
· the content item “Winter” has the content type “Calendar”
· the content item “This summer” has the content type “News”
· the content item “New, old books” has the content type “News”
The container on the home page (the second screen shot) shows all content items of the types “News” and “Calendar”. If a user clicks on one of the two items that have the type “News” he is brought to the “News page” (the first screen shot), if he clicks on the “Winter” news item, he is brought the “Calendar page” (of which we have not included a screen shot).
2 Published content types
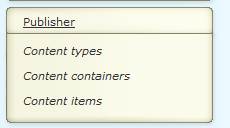
Published content can be maintained via the Publisher section in the left hand navigation:
2.1 What are content types?
Published content types are types that define the “nature” of published content. Typical examples are:
· News items
· Calendar items
· Comments
You can define just as many types of published content as you want to. So in your list of supported published content types you could have: General News Items, Library News, Kids News, Community News, Library Staff News, and others.
You can then link these content types to specific applications in order to create separate views on the content. In such a view, - called a Published content container, you can combine multiple content types into a single display, if you want to, or create separate applications for each content type.
2.2 Content types overview
If you select the section Publisher and then ‘Content types' from the left navigation pane on the Iguana CMS home page, the list of existing content types is displayed. This display uses a generic element in the Iguana CMS, - the overview page of instances of a specific data type.

The Published content types overview page is described in the chapter Instances overview page of the "Management common workflow" document.
The options on the Published content types overview page are described in the chapter Options on the instances overview page of the "Management common workflow" document.
2.3 Content type property overview & options
The properties of content types are ordered in a number of so-called property groups, which are sections on the page. The property groups are:

Each of these property groups forms a separate section on the Profile details page. Each section can be collapsed or expanded by clicking on its title. The and buttons can be used to expand or collapse all sections.
2.4 Basic settings
Content types have the following basic settings.

In use: You can set this type to Not in use. This implies that you cannot link the type to published content applications. Setting an application to Not in use does NOT imply that it is removed from application instances that were already created.
Title (English): You can define a wording for the content type. Typical examples of such types are: News Items, Main Calendar, etc. If a content type is displayed in the Iguana front-end, the value of this property is used.
2.5 Advanced settings
Content types have the following advanced settings.

Define these settings as follows:
Unique ID: The ID of the published content type. This ID is only displayed in the CMS. If a content type is displayed in the Iguana front-end, the value of Title (English) is used.
Allow creation by: You can use this property to define who can create new items. This may be either:
· Anybody (user-generated content supported): this supports user-generated content; anonymous users are allowed to add content
· Logged on users (user-generated content supported): this supports user-generated content; the user must be logged on to be able to create an item
· CMS roles: one or more roles; only users that “have” one of these roles can create items for the content type
Multi-lingual: When this property is set to Yes, multi-lingual content is supported. If a site profile supports multiple languages, multiple language instances of a content item can be created. Please note however that items that are created by end-user will always be created for the current interface language only.
Multi-editing: If you set this property to Yes, multiple people can work on an item. If set to No, only the creator of the item can edit the content.
Apply word filter: If you set this property to Yes, a word list will be used to filter inappropriate content. If the published content item contains words that are present in the word filter list, the word will be replaced with ***** (five stars). Please note that later changes to the word filter list are not reflected in content that was created at an earlier stage.
Display comments: If users are allowed to add comments to published content (see next setting), then you can use this setting to not display these comments (checkbox OFF). In general, both settings will have the same value, but it may be useful in some cases, to turn off the display of comments.
Comments allowed: Set this property to Yes if you want to allow Iguana users to add comments to published content of this type.
Anonymous comments allowed: If a user is allowed to add comments to published content, you can use this setting to determine whether or not anonymous comments are allowed. If not allowed, only users that are logged in are allowed to add comments.
3 Published content containers
3.1 What is a Published content container?
As mentioned before, the Publish module can be used to implement modules such as “News”, “Calendar”, or others. Published content items (e.g. News items) are displayed in so-called “containers”, which can contain either one, or multiple news items.
The Publish module provides two types of “publish application containers”:
· The first one is the container that displays a specific news item. Of this container type there is only one instance. It has no styling, - the styling is defined for each individual content item.
· The second one are so-called “overview” applications, which are containers that display an overview of published content items. You can create as many instances of these overview containers as you want or need. By configuring these overview containers in various ways, the Publish module can act as the abovementioned types of modules or be used in other ways.
The following screen shot shows a container that displays three published items (called “Winter”, “This summer” and “New, old books”).

Another example container, showing a date picker (calendar) and a single published item (called “Winter”).

Examples of such overview containers are:
· show the last n news items (in reverse chronological order) in an overview mode (summary + image)
· show the most read news items (in order of popularity) in an overview mode (summary + image)
· show all “in use” news items, title display only
· show all “in use” calendar items (in reverse chronological order), show all details of the calendar items, include a pager
· show all news items related to a specified keyword
· show a news archive, all news items in reverse chronological order.
A Published content application instance can be included on almost any type of page. When creating pages in a real-life site, you will sometimes want to combine two published content applications on a single page, e.g. [1] an application that shows an overview of news items on the left, and [2] an application that shows the details of a news item at the right. If the user clicks on a link in the overview application at the left, the content of the other application gets updated.
It is important to realize the difference between Published content containers (which are described in this section) and the actual Published content itself, which are not applications, but content that is displayed in the containers (and which is described in the chapter on Published content).
So, to summarize, published content is the combination of the following:
1. Published content types
2. Published content display container
3. Published content overview containers
4. Pages on which published content containers are included
5. Published content items (which can consist of multiple applications, e.g. a Rich Text Item, a RSS feed and a Direct Search result)
Once set up, you will only rarely edit the first three elements of this list, and the full focus will be on the creation of the actual content, - the published content items.
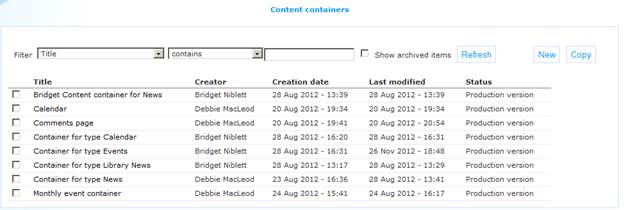
If you select the section Publisher and then ‘Content containers' from the left navigation pane on the Iguana CMS home page, the list of existing content containers is displayed.
3.2 Overview of property groups and options
Content containers (Published content instances) have the following property groups:
· Basic settings
· Advanced settings
· Display settings
· Preview
· View permissions and restrictions (*)
· In use by (*)
· Previous versions (*)
The property groups marked with (*) are described in the described in the chapter Generic instance properties of the "Management common workflow" document.
The available options are the standard options (Save, Save as draft, Copy, Delete, Cancel, Show all and Hide all). These are described in the chapter “Options on the application instance details page” of the “Applications” document.
3.3 Basic settings
The basic settings of content containers are:
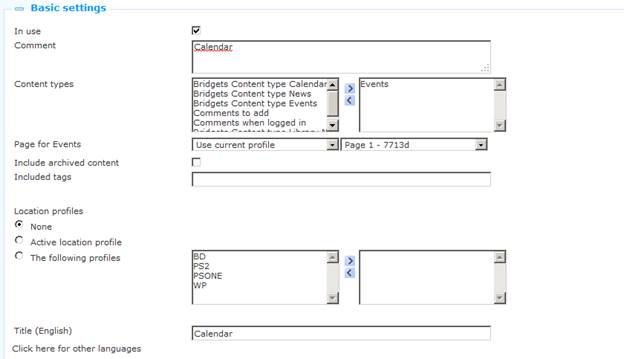
The basic settings determine the content of the Published content application instance. The display settings are defined in the Display settings section.
Define the basic settings as follows:
In use: You can set this application to Not in use. This implies that you cannot link the application to pages. Setting an application to Not in use does NOT imply that it is removed from views (pages).
Comments: You can use the comments property to add notes, such as e.g. a description of the application instance.
The combination of the properties Content types, Include archived content, Included tags and Location profiles defines the actual content of the application. Multiple combinations can be defined.
Content types: Select one or more of the available content types. Only items of the selected types will be included in the display container. You can define multiple content types.
Page for: For each of the selected published content types you have to define the target page. If a user clicks on an item in an overview of published content, the selected item will be displayed on the defined target page. If Iguana detects that it is already on that page, the item will obviously be opened on that page.
Notes
The Page for property is repeatable: there can be multiple content types and each of them has its own target page.
It does not appear immediately when creating a new container, it only shows after you have selected one or more Content types.
Include archived content: If you set this value to Yes, archived items will be included.
Included tag(s): If you define one or more tags, only content items that have one of these tags attached to them will be displayed.
Location profile: If this property is defined, only items that are “linked” to one or more specific location profile are displayed. The possible values of this property are:
· none : no location profile is applied
· automatic : check the option active location profile; only items that are linked to that specific location profile are displayed
· value: select one or more location profiles; only items that are linked to the selected location profile(s) are displayed
Title (English): The title of the content container.
3.4 Advanced settings
The advanced settings of content containers are:

Created by: This is the person who created the published content application instance. It also contains the date and time on which the application instance was created.
Modified by: This is the person who last edited the published content application instance. It also contains the date and time on which the application instance was modified.
Unique ID: The ID of the published content application.
You cannot modify these properties.
3.5 Display settings
The display settings of published content applications are:

Define these properties as follows:
Template: You can define two templates for a display container; combined they will determine the actual appearance of the container widget. The template is the overarching template that contains the overall look and feel of the container, i.e. of the list of items as a whole, while the Item template contains the look and feel of individual items in the list that is held in the container.
You can modify these templates or create your own custom template via the . [The template determines in which order which display elements such as pagers, etc. are included in the display container and at which location.]
Item template: The item template determines the look and feel of items in the list that is held in a published content container. The following default Item templates are available:
|
Template name |
Description |
Example |
|
summarynarrow |
The display shows: the title (in bold) the date (small font) and the summary. |
|
|
summarybigdate |
The display shows: the date (big font) title (in bold) and the summary. |
|
|
summarythumb |
The display shows: a thumbnail the title (in bold) the summary and the date (small font). |
|

The display elements that can be shown include: Item title, thumbnail, short summary, date and author.
Number of items to display: You can indicate how many items need to be displayed. This can be any value between 1 and 100.
Display style: The display style can be either “flat” or “hierarchical”. If the type is hierarchical, the published content items are displayed grouped per month.
Sort by: This value determines in which order the published content items are displayed. The possible values are:
· chronological (oldest one is displayed first)
· most recent one first (reverse chronological)
· most popular (most viewed one is displayed first).
Sort comments by: You can decide how comments are sorted. The possible values are:
· chronological (oldest one is displayed first)
· most recent one first (reverse chronological).
Include calendar: If you set the value of this property to Yes, a calendar control will be included in the application instance.
Include “Select week” in calendar: If the value of this property is set to Yes, a link “Select week” will be included in the calendar control. This link allows the selection of all items of the “selected” week.
Include “Select month” in calendar: If the value of this property is set to Yes, a link “Select month” will be included in the calendar control. This link allows the selection of all items of the “selected” month.
Allow navigation to past in calendar: If the value of this property is set to Yes, it is possible to navigate to dates that are in the past. (This may be relevant for the access to archived items.)
Disallow navigation to future in calendar: If the value of this property is set to Yes, it is not possible to navigate to dates that are in the future. (This may be relevant for the access to archived items, where you maybe do not want to show items that are not yet archived.).
Calendar can display events from following months: When this option is checked, it means that when the calendar display is used, and say the current month shown is November, an event from December can still be shown for the current list of events (provided its publish to/from date range includes 'today').
Text at top (English): You can define a text that will be included at the top of the container. This can be used to define a small text or a hyperlink (e.g. “Click here to view all News Items”.
Text at bottom (English): You can define a text that will be included at the bottom of the container. This can be used to define a small text or a hyperlink (e.g. “Click here to view all News Items”.
3.6 Preview
The Preview section displays the published content application and reflects the current settings of the published content application instance properties.
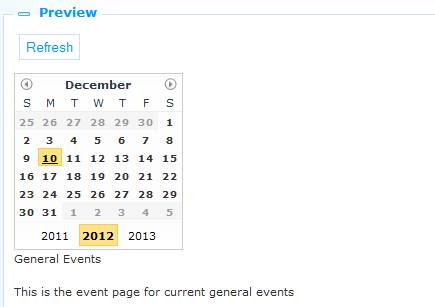
If you click on , the published content application will be loaded again to reflect any changes to the property settings.
Please note that the preview display in the CMS can differ significantly from the display in the actual front-end, as it does not contain much CSS styling, etc.
3.7 Placing a published content item on a page
The container that can display content items (details) does not know what the content items that will be displayed look like. To give a concrete example: a specific news item may be formatted in a single “column”, but also in two or three columns.
If the container is placed on a page where it has ample place, there is no issue, and the news item will be displayed as formatted. However, it is not unthinkable that the same container widget is placed on e.g. the home page, where it only has a small place on screen.
Therefore, if a container is placed on a specific page, this needs to be resolved.
If a container is placed on a page, two additional properties need to be defined:
· Force to one column: if the value of this property is set to Yes, the applications that are linked to the published content item are forced to a display in a single column
· Open with content item: one can define a specific content item id; this property can be left empty; in such a case, Iguana will try to select a content item id automatically, - in those cases where this is possible.
See the chapter Adding a new Published content container to a page in the document on Pages & Profiles for more information.
4 Published content items
4.1 Introduction
See the introduction in section 1.1 (What is a ‘Published content' application?) for a description of what “Published content” is.
There are two ways to create published content:
· Create published content via the CMS
· Create published content via the Iguana front-end interface.
4.2 Creating published content via the CMS
To create published content via the CMS you act as follows.
1. Select the option from the Published content section in the CMS menu pane.
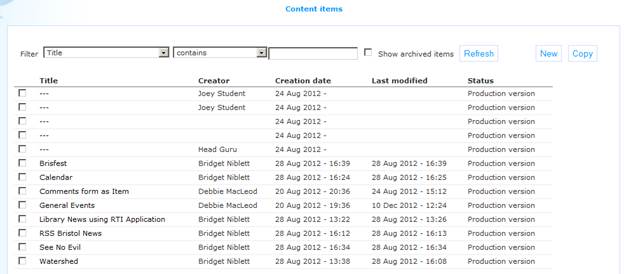
2. A list of all published content is presented. Select the button at the top of the page.
3. An input form is opened that allows you to create the content. Fill in the data that is required (see below for a description).
4. Click on to save a draft copy. Click on to publish the item and make it available for inclusion in the front-end.
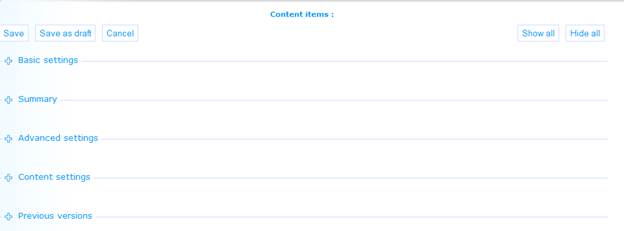
4.2.1 Basic settings
Content items have the following basic settings.
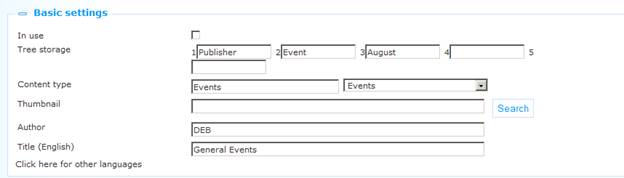
Define these settings as follows:
In use: You can set a Content item to Not in use. This implies that the item will not be included in any container. This is relevant if you are still working on the item and have not yet finished it. (A similar effect can be achieved if you set the “Publish starts on” value to a date in the future.)
Tree storage: The tree storage allows you to organize your content in a hierarchic folder structure. You can define a maximum of five levels in the storage tree.
Content type: The type of the item, - you can select from the list of content types that are In use.
Thumbnail: You can attach a thumbnail to a published content item. This thumbnail can be displayed in published content overview containers.
Author: The author of the content item.
Title (English): The title of the item.
4.2.2 Advanced settings
Content items have the following advanced settings.

Define these settings as follows:
Created by: This is the person who created the published content application instance. It also contains the date and time on which the application instance was created. You cannot modify this.
Modified by: This is the person who last edited the published content application instance. It also contains the date and time on which the application instance was modified. You cannot modify this.
Publish starts on: This is the date on which the item needs to appear in publish containers for the first time. It is NOT the date on which an event starts (this is the Item starts on property).
Publish ends on: This is the date on which the item needs to appear in publish containers for the last time. It is NOT the date on which an event ends (this is the on property).
Note
The system only selects those events whose publish to/from date range contains 'today'.
Item starts on: This is the “start date” of the item, i.e. the start date of an event. See also the Publish starts on and Publish ends on properties.
Item ends on: This is the “end date” of the item, i.e. the end date of an event. See also the Publish starts on and Publish ends on properties.
Tags: One or more tags that are linked to the content item. These tags can be used as a filter in the published content containers.
Comments not allowed: You can use this setting to determine whether or not users can add comments to this item. Set this property to No if that is not allowed.
Location profile(s): You can define one or more location profiles for which this news item is relevant. These location profiles can then be used as “restrictions” in content item overviews (e.g. only show activities of a specific location profile, or show only news of a specific location).
4.2.3 Summary
You can use the to add a Summary text to the content item. This is used for display in containers.

See the chapter Rich text editor in the document on Applications for more information.
4.2.4 Content settings
This is the actual content item. A content item has a type, which is either “Rich Text Item” or “Applications & layout”.
Published content items of the type “Rich Text Item” are single-application, i.e. the whole content item consists of a single Rich Text Item.
Published content items of the type “Applications & layout” are multi-application and can consist of any combination of applications, e.g. an RTI + an RSS feed, two RTI's and a Direct search application, etc. etc.
Content items of the “Rich Text Item” type
You define the content as a , using the .
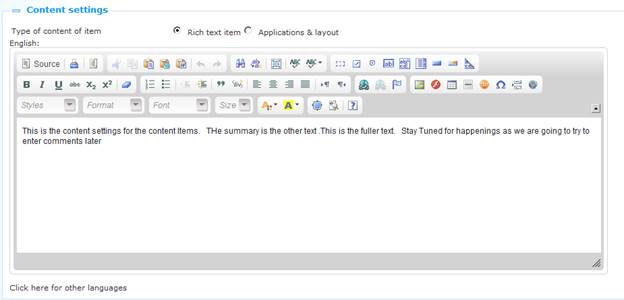
Note
RTI's have a maximum size of 32K, including HTML formatting.
Content items of the “Applications & Layout” type
Content items of this type are any combination of applications (e.g. RTI's, word clouds, RSS feeds, Direct search, and others).
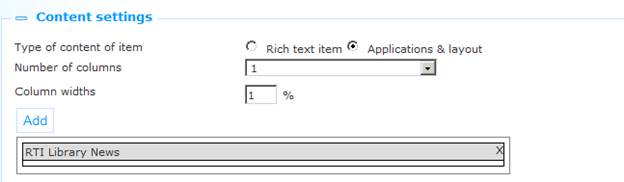
The applications are placed into one, two or three columns, of which you need to specify the width as a relative value.
Number of columns: Define the number of columns, - this is 1, 2 or 3.
Column widths: Define the relative width of the columns as percentages.
After you have defined the column layout you can use the button to place applications into one of the columns. This will open the application selector. This is a treeview that allows you to browse the list of existing applications. You can browse the list of applications and select the one you want to add to the page by clicking on it.
You can move applications between columns by dragging and dropping them between columns.
4.2.5 Linking from one published content item to another
Linking from one published content item to another requires a specific notation in the hyperlink that links to the “other” item (if they are both on the same page). This is due to the fact that the published content item id is a part of the hash parameters in the URL. This implies that if you link from news item 1 to news item 2 on the same page, nothing changes. The only thing that changes is the hash part of the URL, - which has the beneficial effect that the whole page is not reloaded, but also has the “negative” effect that the new item (“2” in our example) is not displayed.
To circumnavigate this, you can “fool” the application by adding a “dummy” parameter to the URL, i.e. to the part of the URL before the hash sign. So if you add the dummy “&dummy=1234” to the URL, the new item (“2” in our example) will be displayed. An example of such a URL is:
http://www.bibliotheekvannu.nl/iguana/www.main.cls?p=*&v=*&t=1234#contentitem=abcd_1234_de.
4.3 Reacting to published content via the front-end
You can allow users to react to published content. This implies that users of an Iguana website can react to published content. Their comments will be visible for other users of the site.
If a user reacts to a published content item, he is given access to a simplified version of the Rich Text Editor. The available options are Bold, Italics, Underline, Numbered lists and Bulleted lists.
Comments to published content items are displayed in reverse chronological order (the most recent one first).
5 Published content RSS feeds
Please note
|
|
This section describes how new Published content can be exposed as RSS feeds. Related information can be found in the following sections: · in the document on Interests: you can find similar functionality for Published content items in the chapter Interests RSS feeds · in the document on Applications you can find information on how to integrate in the Iguana front-end. |
5.1 What are “Published content RSS feeds”?
You can expose new published content items for specific content container as RSS feeds. To enable this, Iguana offers an RSS channel for each Published content container.
The RSS channels can be added to any RSS reader and once that is done, new feeds (new items) will appear automatically in the RSS reader.
5.2 The structure of a Published content RSS channel
The structure of a Published content RSS channel is as follows:
baseURL + Service.RSS.cls + ?type=publish + &channel=[Channel ID]
e.g.
http://nlbavwvbis2/iguana/Service.RSS.cls?type=publish&channel=baab5809-0f40-40ab-ac2b-fb5629c7c6ae
The Channel ID is expressed as the content container's UUID, which you can see in the CMS on the content container's details page.
· Document control - Change History
|
Version |
Date |
Change description |
Author |
|
|
1.0 |
October 2011 |
Creation |
|
|
|
1.1 |
December 2011 |
Added description for multiple properties; restructured document |
|
|
|
1.2 |
December 2011 |
Reviewed content; added screen shots |
|
|
|
1.3 |
December 2011 |
Processed comments from EdwinVDG |
|
|
|
1.4 |
January 2012 |
Added section on RSS feeds |
|
|
|
1.5 |
January 2012 |
Added header |
|
|
|
1.6 |
February 2012 |
Reviewed |
|
|
|
2.0 |
May 2012 |
Reformat for online help doc |
|
|
|
3.0 |
December 2012 |
Added screen shots, guidelines, more explanations; reformatted; minor corrections |
|
|
|
4.0 |
April 2016 |
More on calendars |
|
|